
Backpacking: Ski Tour To Glacier Point in Yosemite National Park


The Itinerary:
Friday
Fly into San Francisco and arrive at 7:30p.
Drive to the nearest REI to buy stove fuel before they close.
Drive out to Merced and sleep at booked AirBnB.
Saturday
6am breakfast at Paul's Place Restaurant & Bakery.
Drive to Yosemite Ski & Snowboard Area at Badger Pass to park and get our overnight permit.
Ski up 10.5 miles and camp at the top of Glacier Point for the night under the full moon.
Sunday
Make breakfast and pack up.
Ski down 10.5 miles and promptly slam a beer.
Quick drive through Yosemite Valley, stop at Village Store to get food and clean up.
Drive 4 hours back to SFO airport and fly home.
Easy enough, right?!
The Trek:
10.5 miles out-and-back on skis up Glacier Point Road (groomed).
21 miles round trip.
Ascent Elevation Chart
Descent Elevation Chart
Glacier Point Road Winter Trail Maps
The Permit:
You must obtain an overnight permit if you are planning on camping up on Glacier Point. You can pick one up at the Badger Pass Ranger Station located at Yosemite Ski & Snowboard Area. When you arrive, they have a few 15-minute parking spots out front that are perfect to run in and get permits. You must go to the ranger station located in the A-Frame building right of the chairlifts. Just walk out onto the snow toward the chairlifts, look to your right, and you can't miss it. The rangers can answer any questions you have, and will provide you with an overnight camping permit, a parking pass to leave on your dashboard, and they'll direct you to the overnight parking spaces around the corner.
The Gear:
We were backpacking and camping up to the top so we brought all of our typical camping gear, plus a shovel, some waterproof layers, and fuel to melt snow so we didn't have to carry too much water.
I'm an alpine skier and just getting into Alpine Touring (AT) and skinning, so I brought my new AT setup to use. I can imagine that skins would probably be helpful in the colder months but it was so warm when were were there March 11-12 that we were in shorts and short sleeves the entire trips up and down. Because of that, the snow was so soft that the skins weren't necessary and only slowed me down by prohibiting glide.
My friend Matt is a boarder and he had planned to snowshoe and either carry or tow his board, boots, and pack. After talking it over with the rangers though, he opted to rent a proper cross-country ski setup. There's a separate Nordic Center building across from the main lodge of the Yosemite Ski Area if you want to rent cross-country skis or snowshoes. His cross-country ski rental was between $40-50. He had never once cross-country skied and I was impressed at how well he did, especially while carrying a 35-40lbs backpack.
Word to the wise: Leave the AT setup at home and either snowshoe or cross-country ski. The AT setup with your standard AT ski boots is way too heavy and uncomfortable to justify lugging it all the way up and down.
The Trail:
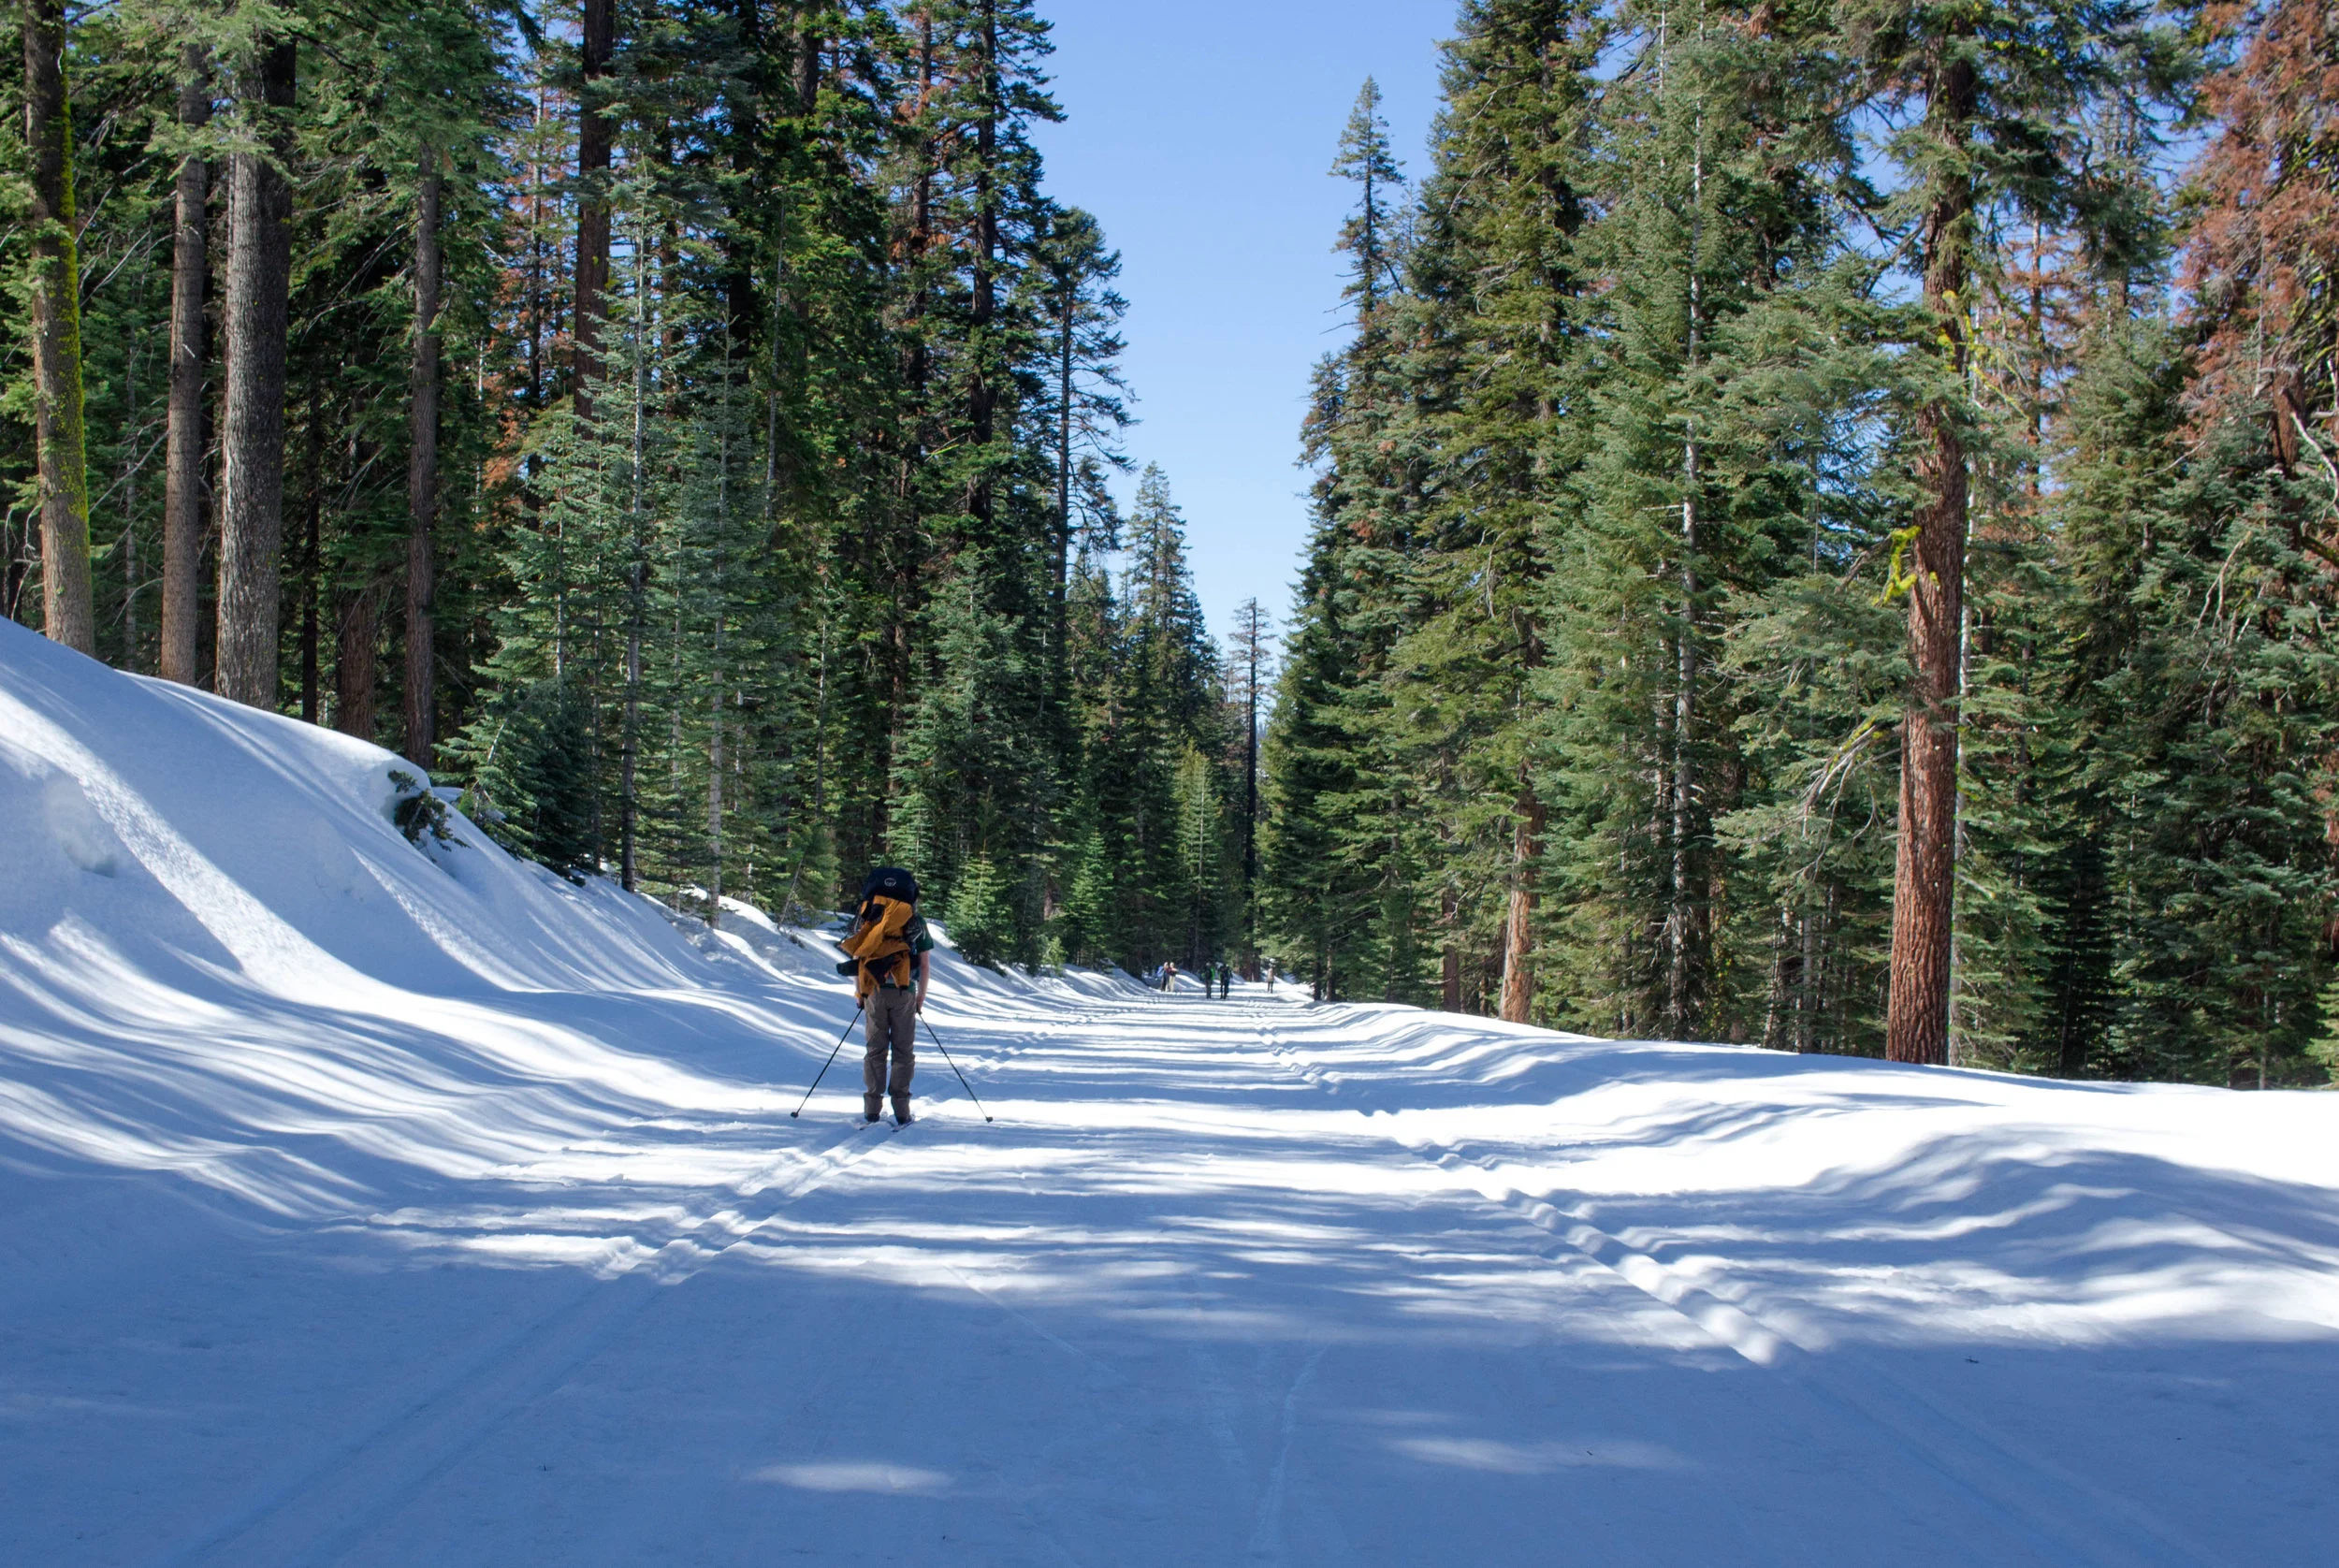
The trail itself isn't the most scenic but does travel through a heavily wooded area with enormous trees and a few open meadows. There are also cross-country ski tracks on both sides of the road for most of the 10.5 miles (pictured below).
Within the first half mile I knew my feet were in serious trouble. I had some new AT ski boots that I haven't had fitted yet and my feet had way too much room to move around within the boots. They got chewed up the entire way up and down, so for me this trip was more mentally exhausting in trying to manage the pain than anything else. It's been almost two weeks since this trip, and I'm still limping around trying to heal all the blisters.
The trail starts with a quick uphill and gradual downhill over the first 3.5 miles and 400 vertical feet. After that, you start the long trek uphill which covers every bit of the next 5 miles and 500 vertical feet. I feel like it is worth nothing again that all the slopes of this trek are moderate at worst. There are really no steep sections at all (basically climbing 100 vertical feet over every mile).
We also didn't carry much water because we had planned to melt snow and filter it. Big mistake, but only because we planned poorly and didn't bring enough fuel and ran out after making breakfast. I ended up chomping on snow and taking small sips of my water the entire trip.

Mile 8 is where the trek plateaus around an elevation of 7,800ft. The next 1-2 miles is relatively flat and offers some slightly downhill relief. You'll have to go back uphill immediately following that, but the last mile is the steepest part of the hike dropping you 500 vertical feet downhill. It's the first time you'll actually gain enough speed to get some turns in.
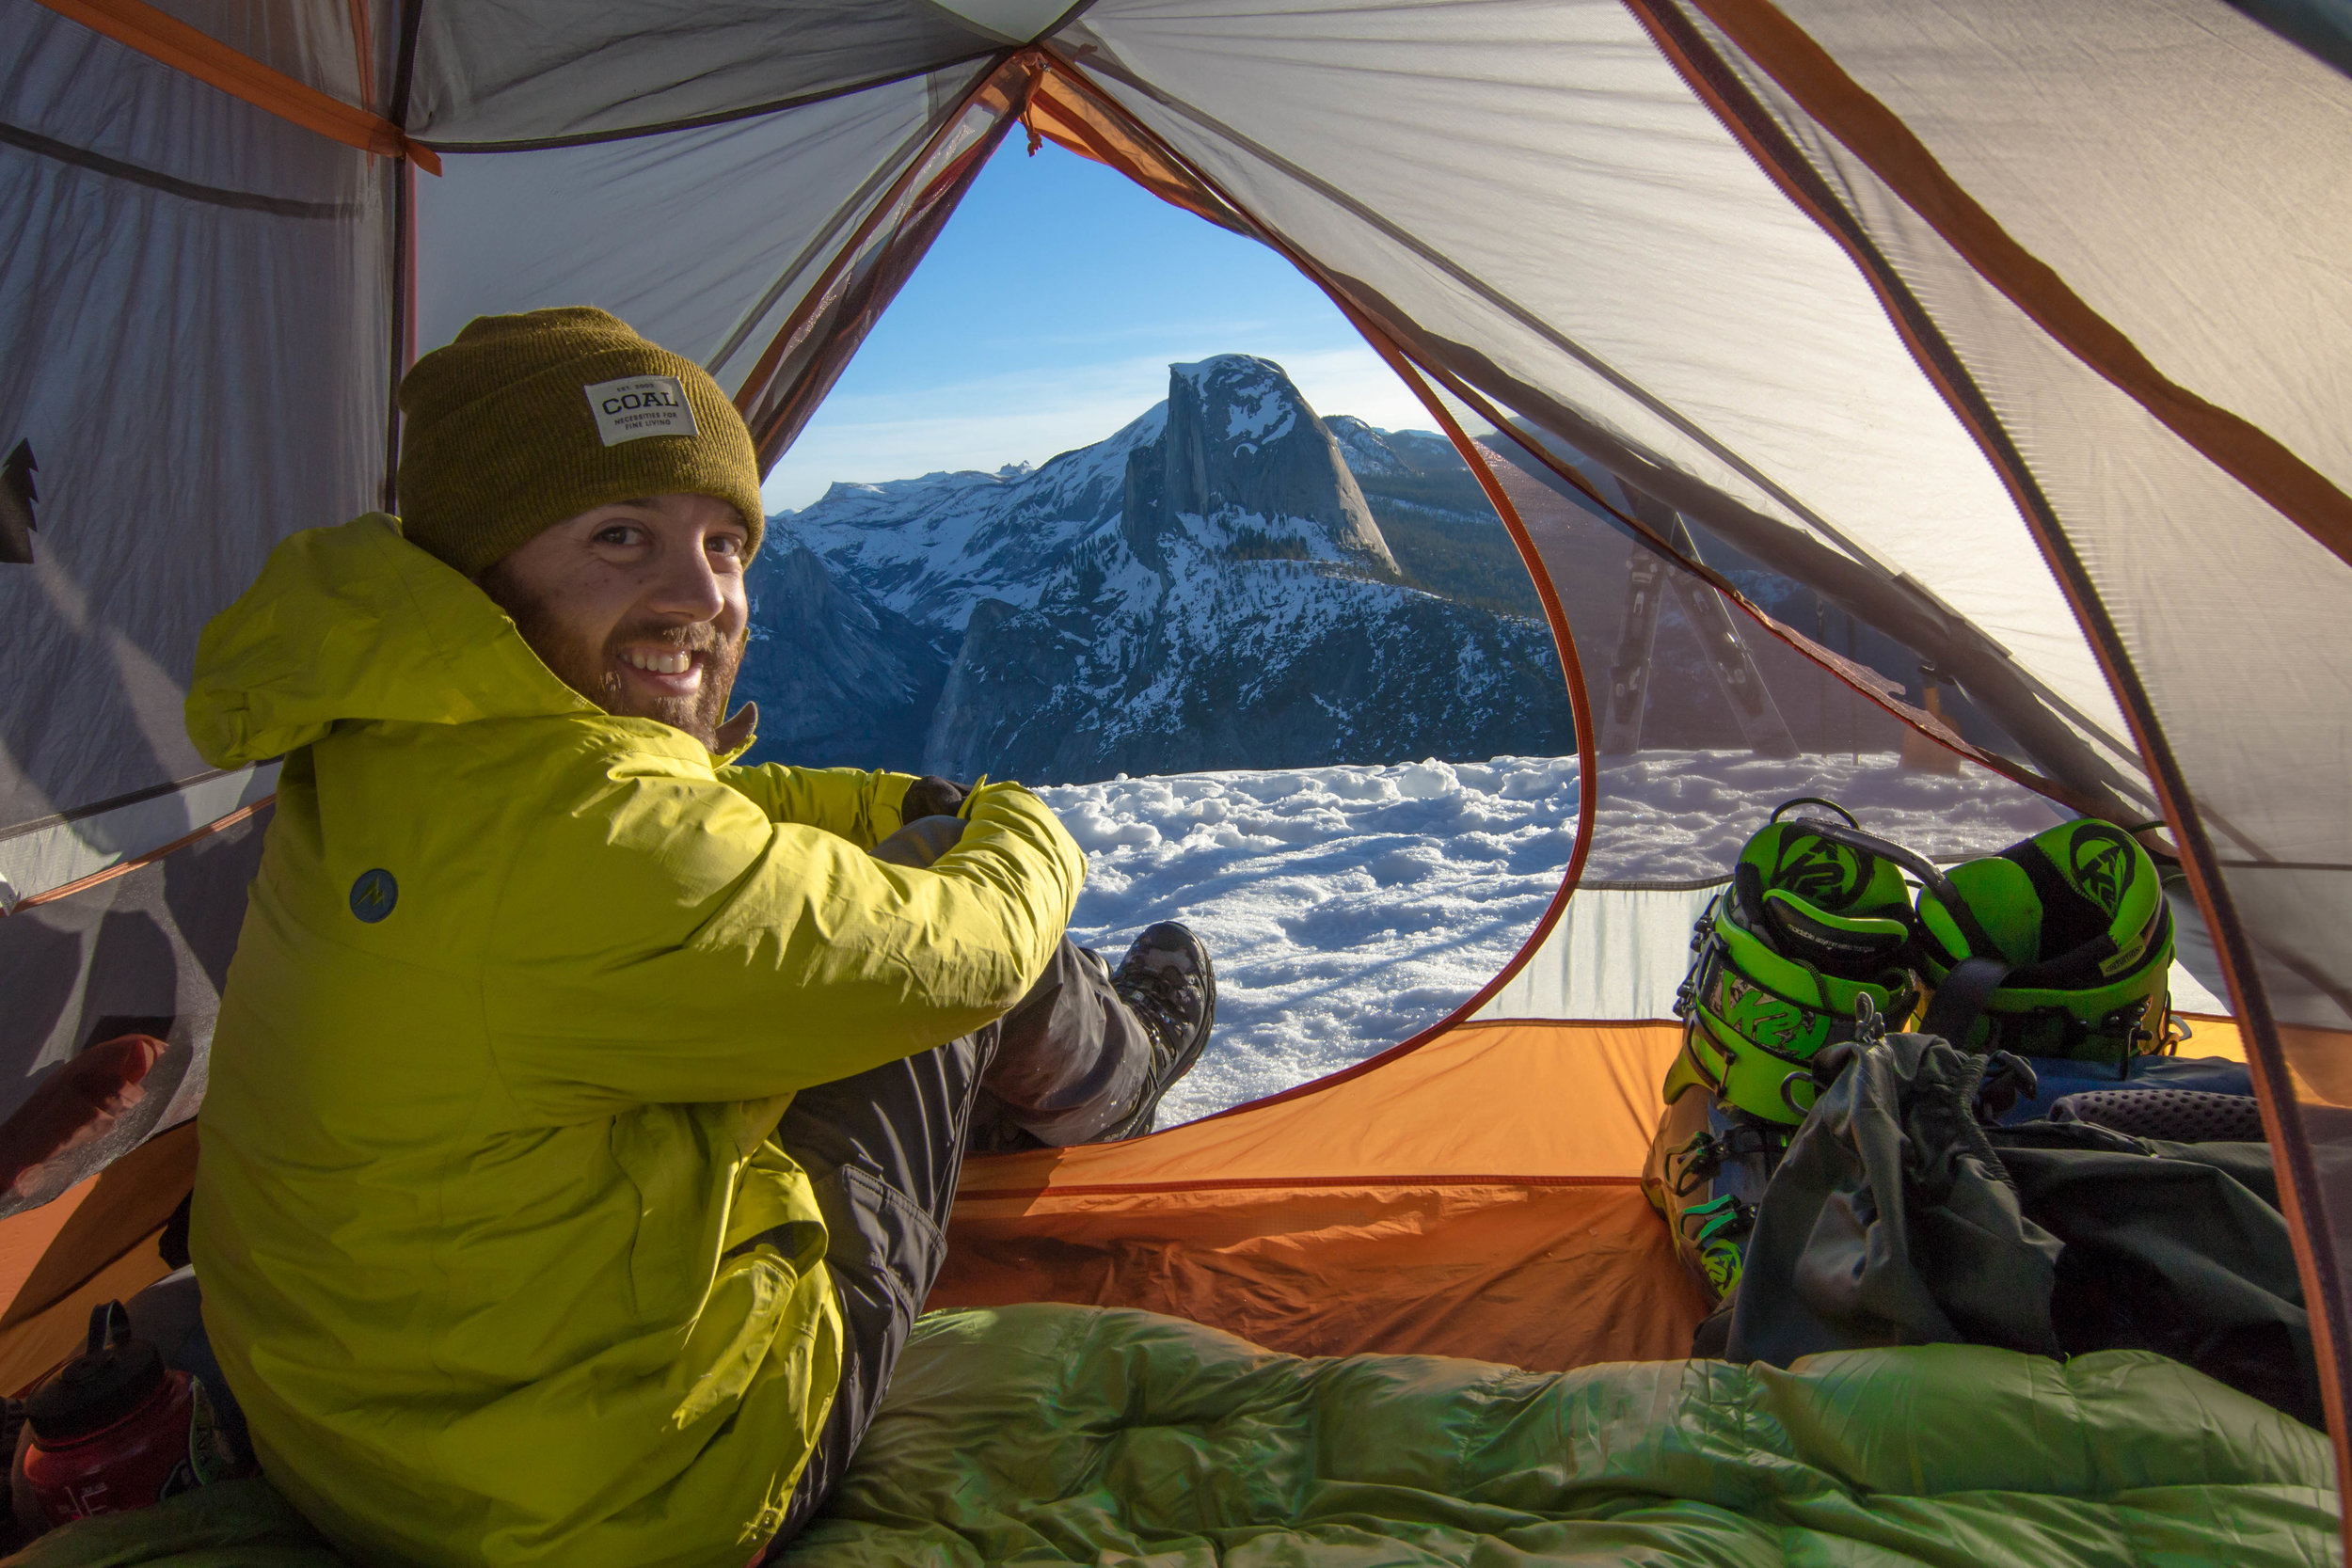
I was absolutely giddy that I was finally skiing downhill after five hours of painful uphill skiing. As if the cool wind in my face wasn't enough to get me excited, I then turned a corner and was treated to this absolutely stunning view of Half Dome.
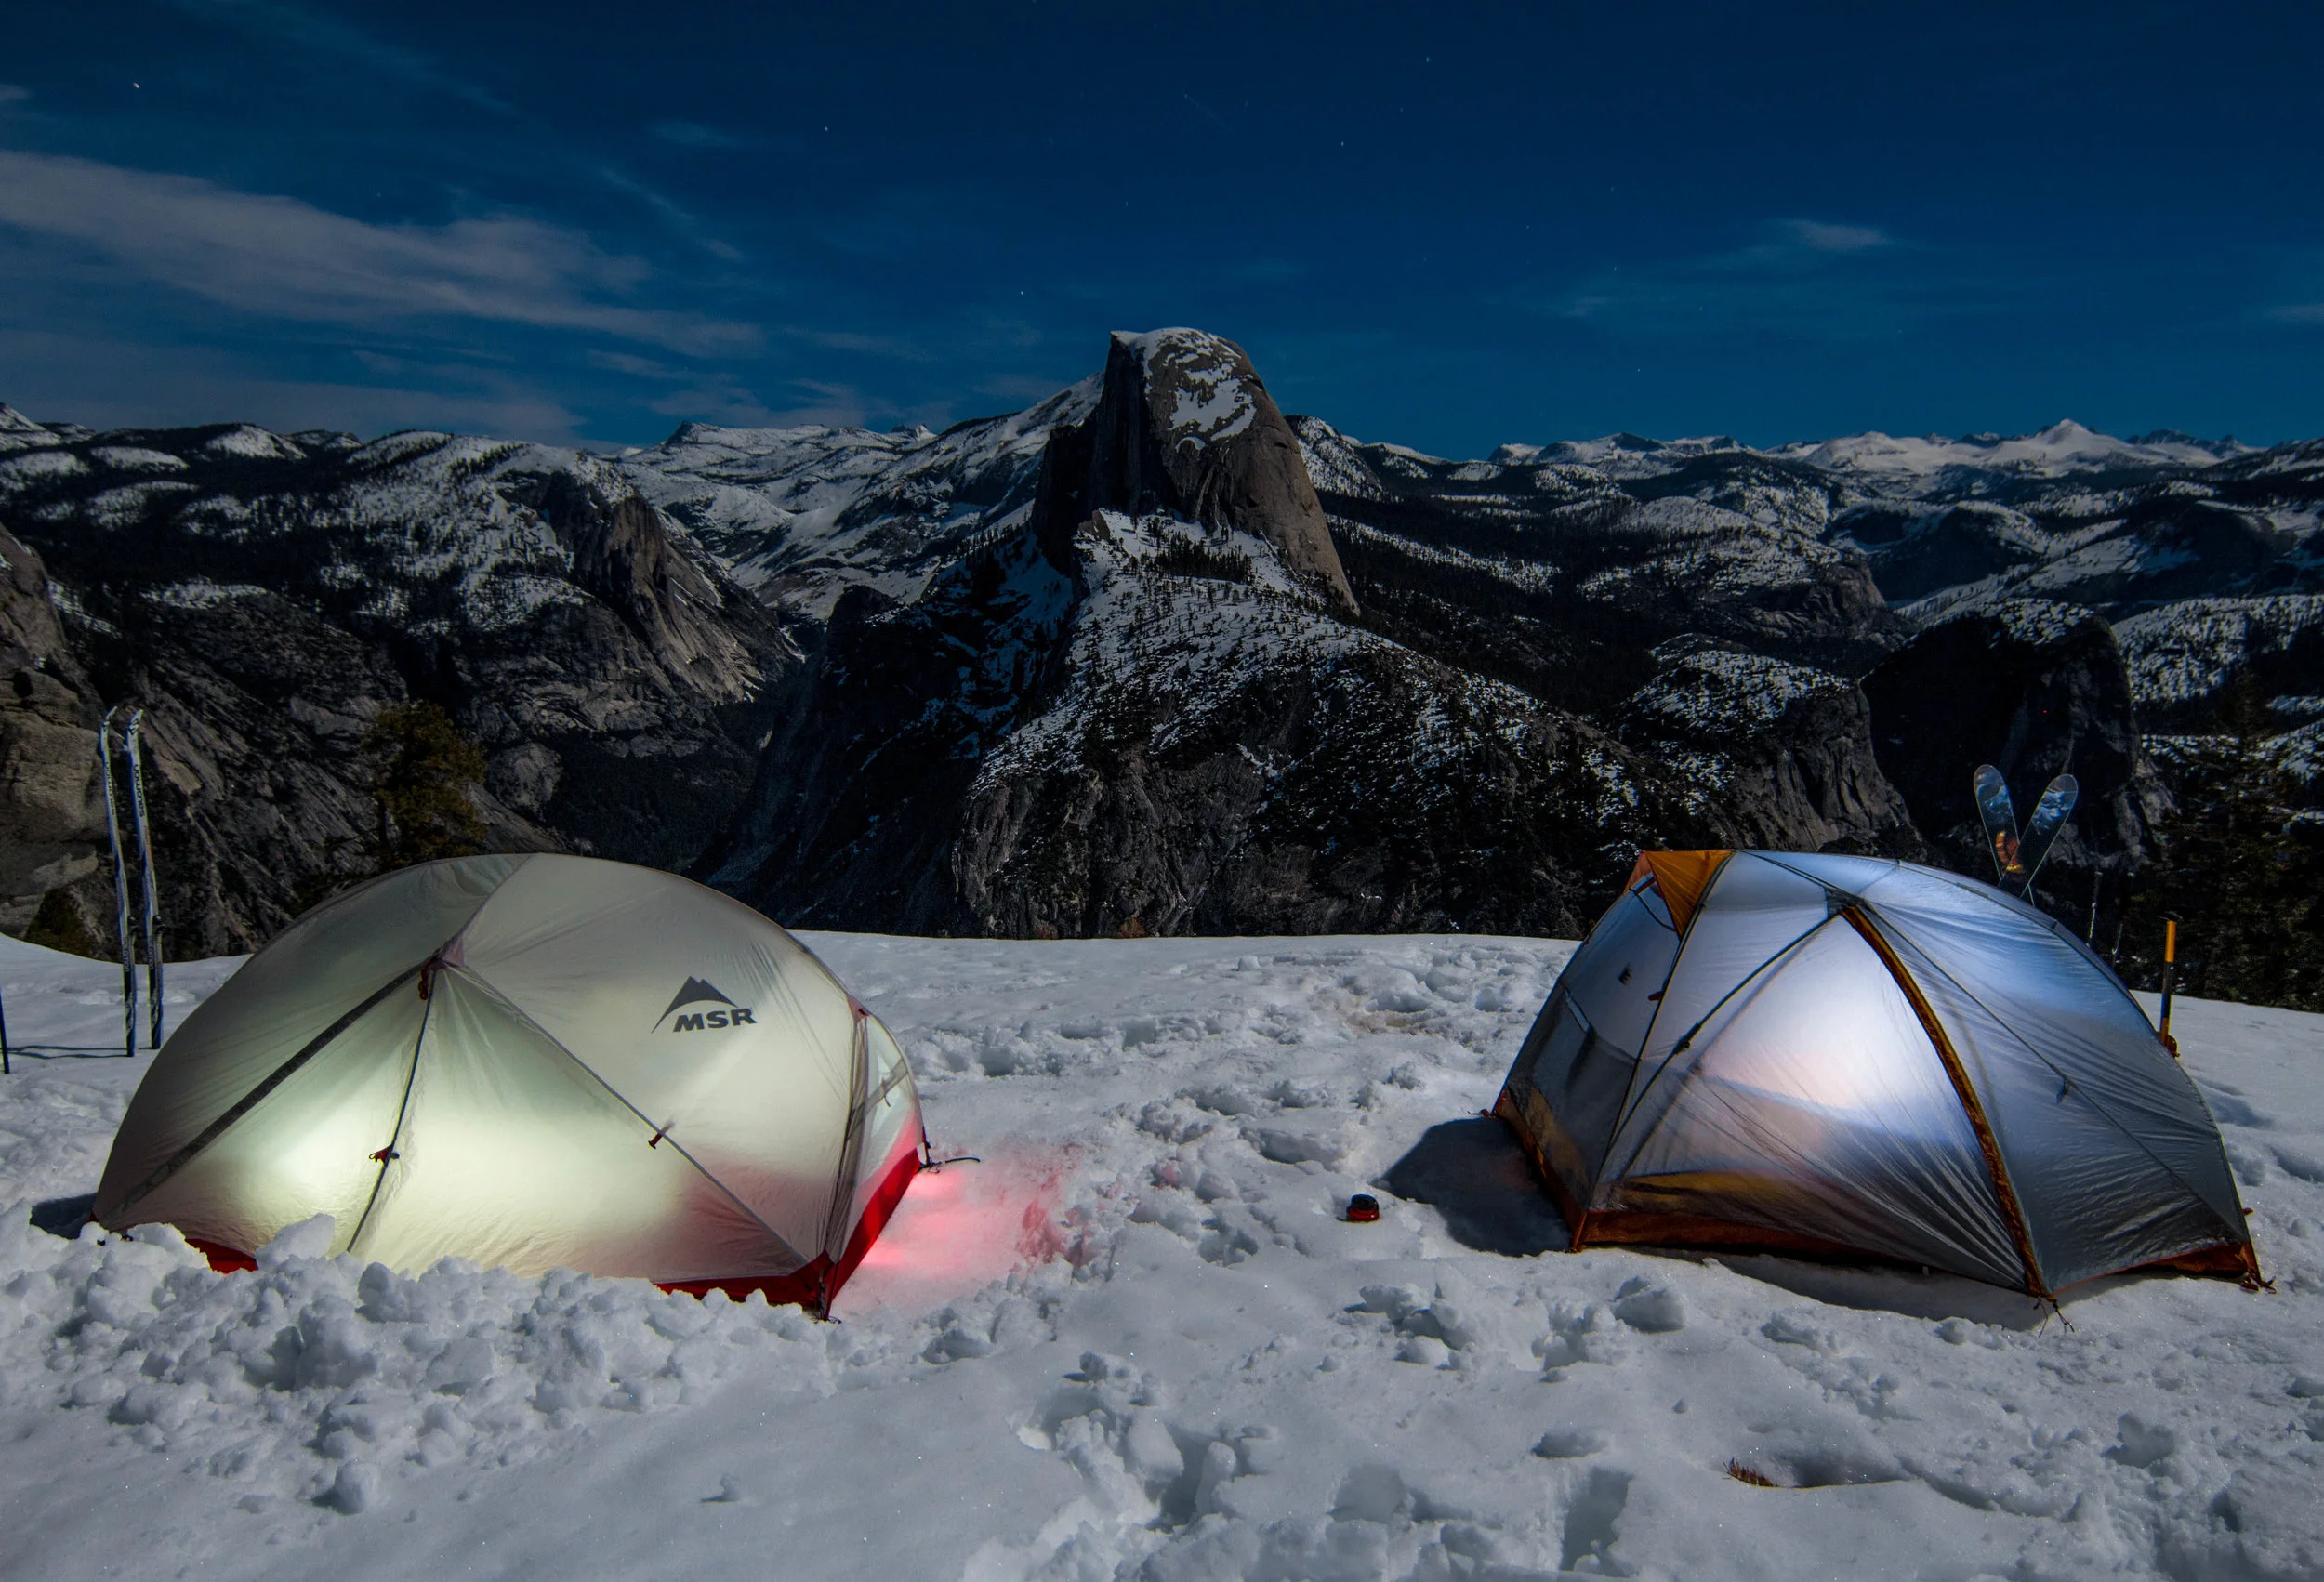
The elevation at the top is only about 50 feet higher than the trailhead elevation, but who cares?! We made it! We then picked out a proper camping area away from the lodge and RELAXED! By the time we caught our breath and got our tents set up, the sun was just setting in the west while the full moon was rising in the east (pictured below). This was an awe-inspiring view that I truly felt like we earned.
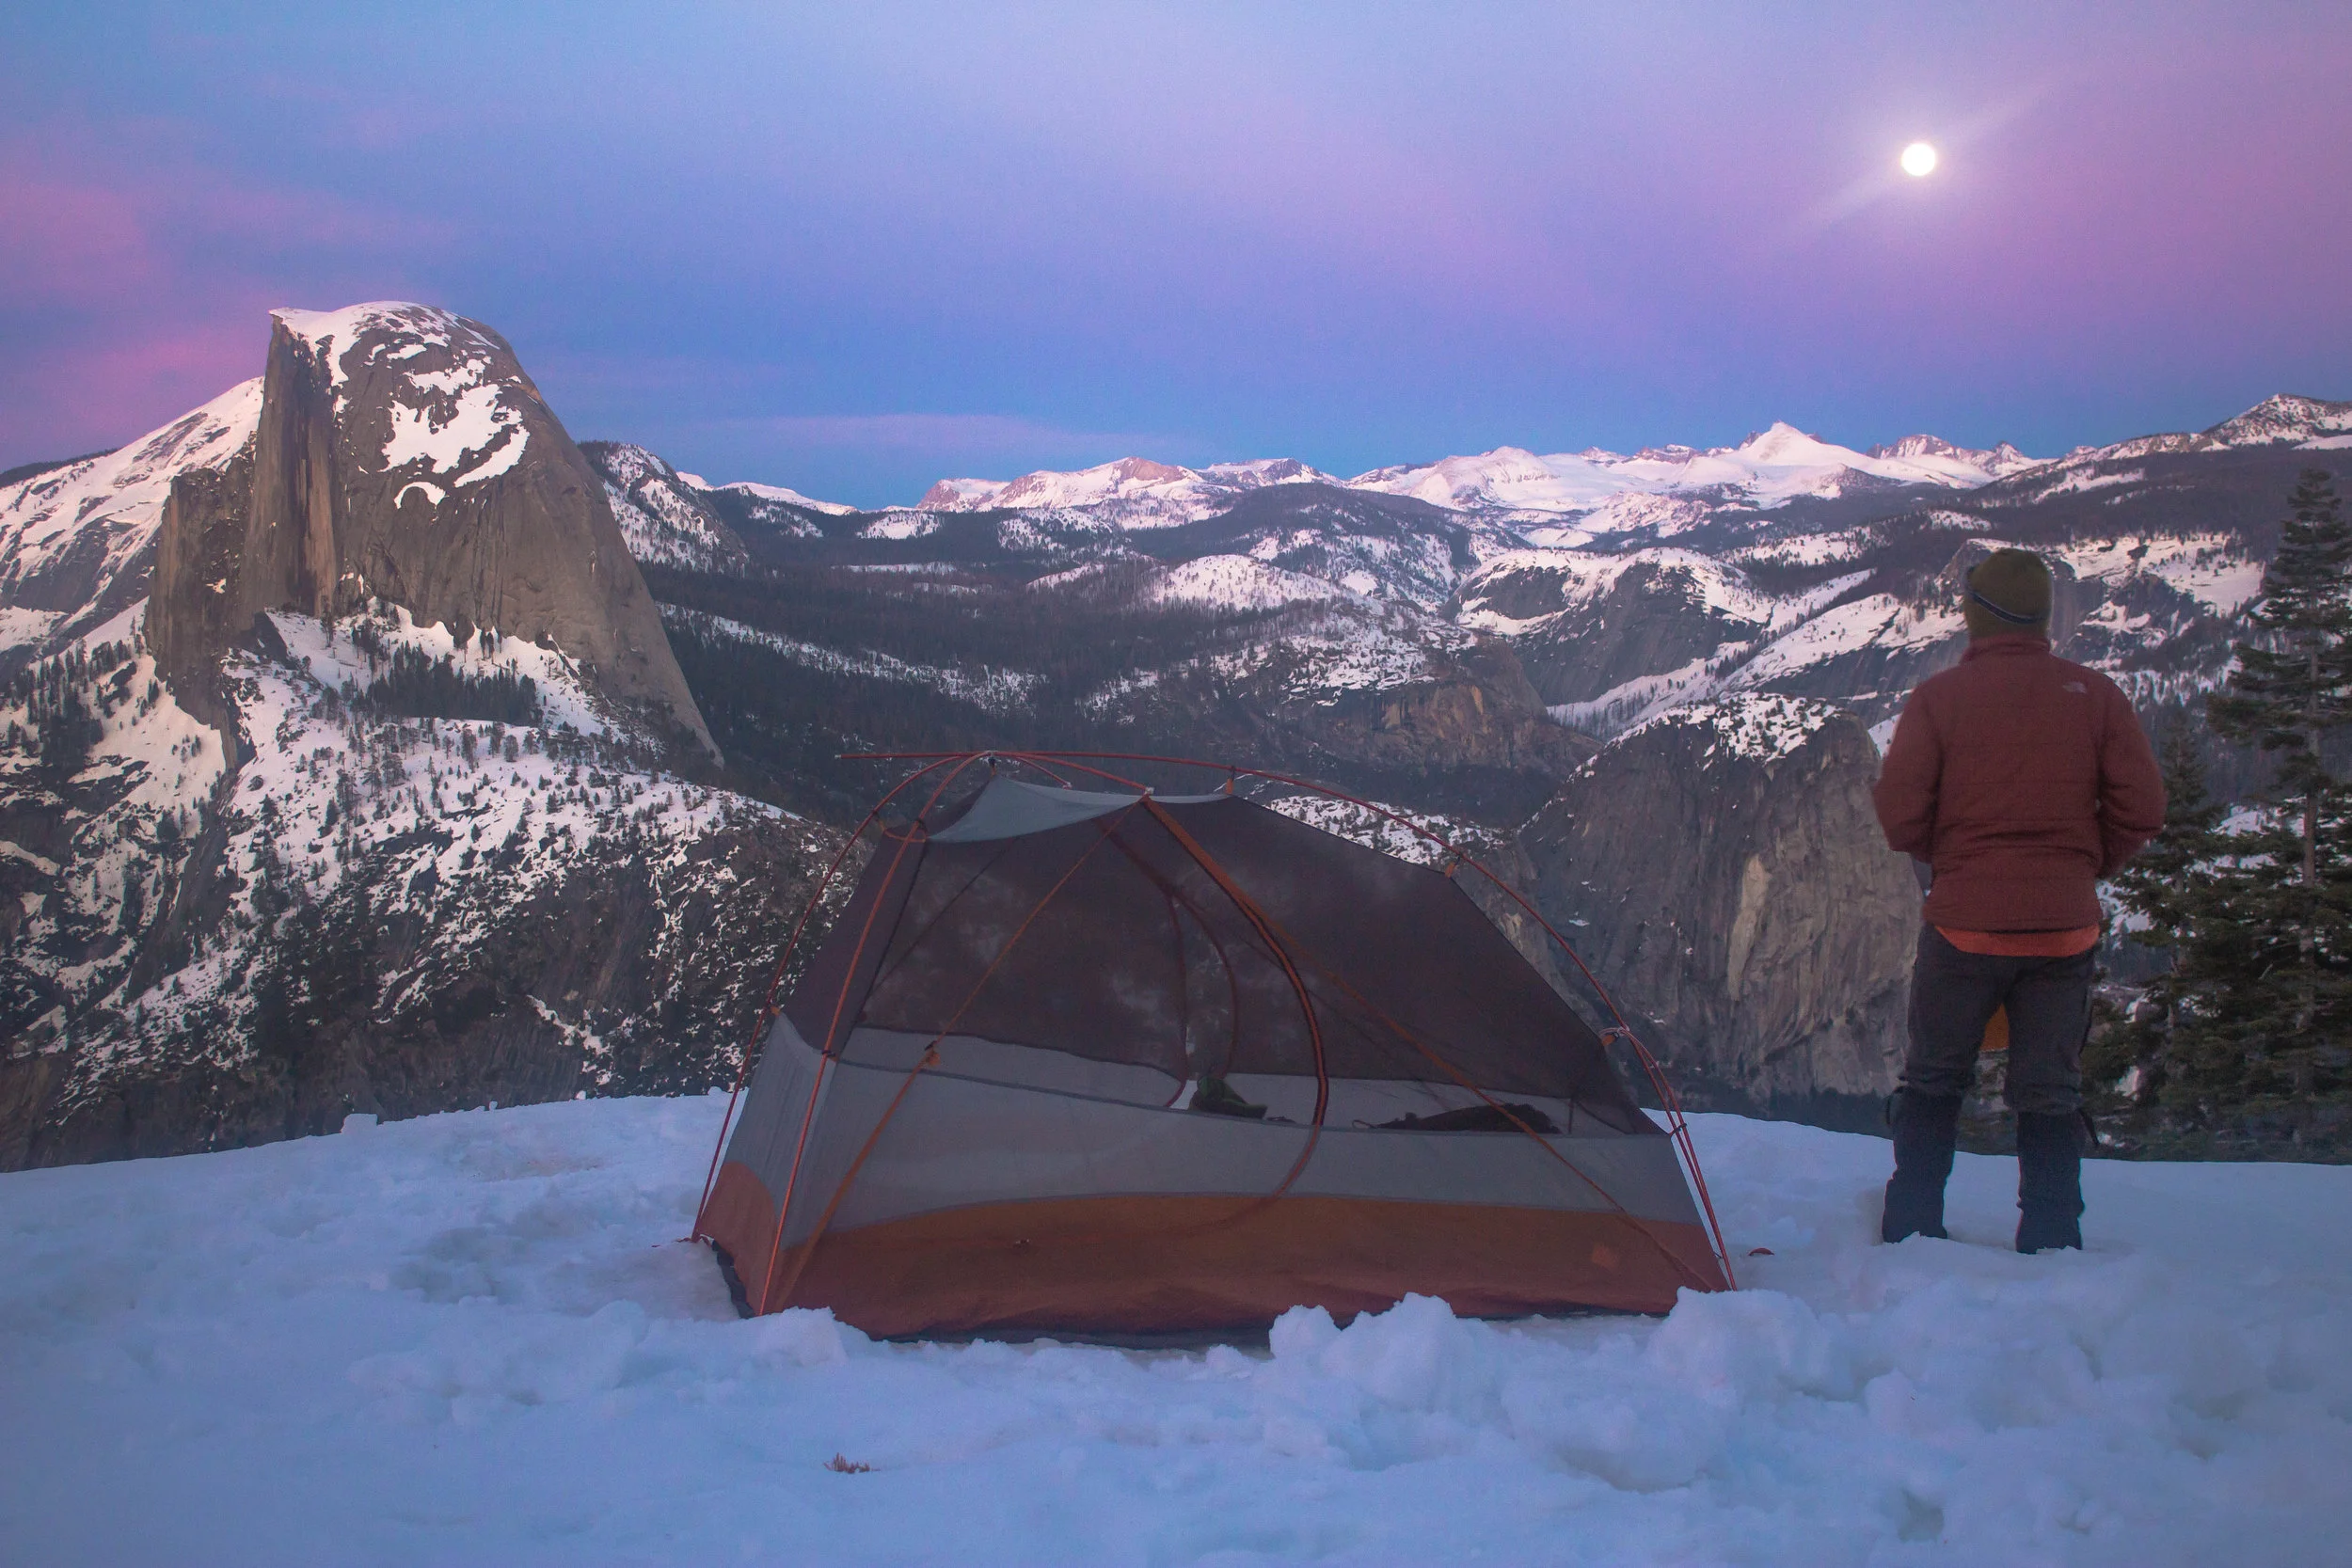
The full moon provided enough light to make headlamps optional around the campsite and we made the short hike to the proper Glacier Point viewing area so we could see and take pictures on Yosemite Falls and the valley perfectly illuminated by the full moon.
After a good night's sleep, we awoke for sunrise which was an hour later than the day before thanks to Daylight Savings. After a hardy scrambled eggs and bacon breakfast, we used the last of our fuel to melt some snow and we packed up and hit the trail.
It took us roughly 6 hours up and 4 hours down, and then a 4.5 hour drive back to the San Fran airport. Oh, and even after getting to the bottom, quickly driving through Yosemite Valley and straight to the airport, we STILL missed our 9:00pm flight. So if you're doing a crazy quick trip like this, plan accordingly! Lucky for us, we were able to jump on the first flight out the next morning at no additional charge and we were back in Denver and at work by 11am Monday morning.
The Good:
Gradual slopes throughout
Free camping at Glacier Point
Four bathrooms along the way
Absolutely unbelievable views to wake up to
Not crowded. Even fewer people make it all the way to the top
Virtually unlimited spots to camp with wide open Half Dome views
Most people at the top are either day-hiking or staying in the lodge
The Bad:
A long trek (21 miles RT)
Not many accessible water sources
Ups and downs. Only about 50 feet net elevation gain
Coming back down, the last 3.5 miles uphill will wear you out
Long drive from San Fran. Took 4.5 hours to get back to SFO airport
Not as scenic (except the top) as you might expect from a Yosemite hike
The Outcome:
After our first few hours on the trail carrying our packs on skis for the first time ever, it was clear that we were overly ambitious about this adventure. I would absolutely recommend this trip, but only for those experienced in ski touring or backpacking on snowshoes over long distances. Day-hiking to Glacier Point can be easily handled by anyone as long as you get an early start.
Physically, it's not all too strenuous of a trip, but it's a long ways to go with a full 30-40-pound pack on your shoulders. Whether as a day-hike or a backpacking trip, everyone should make it a point to trek up to Glacier Point during the winter months. This long gradual hike that will reward you with the iconic panoramic views of Yosemite Valley without the crowds you're accustomed to during the warmer seasons.